Creating an API Token
To create an API Token on the platform:

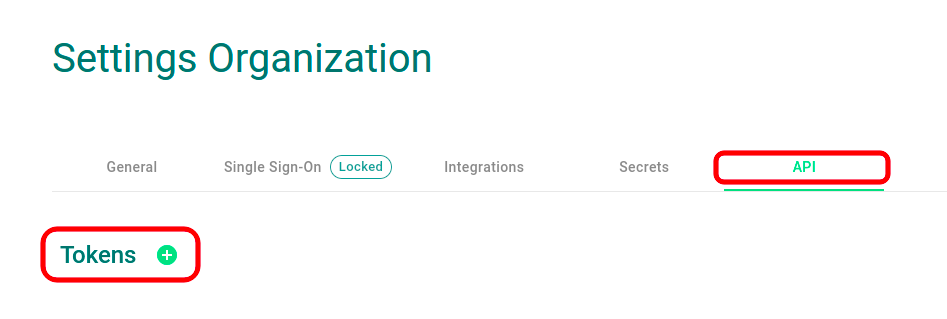
2 – In the API tab, click the “+” button to create a new API Token
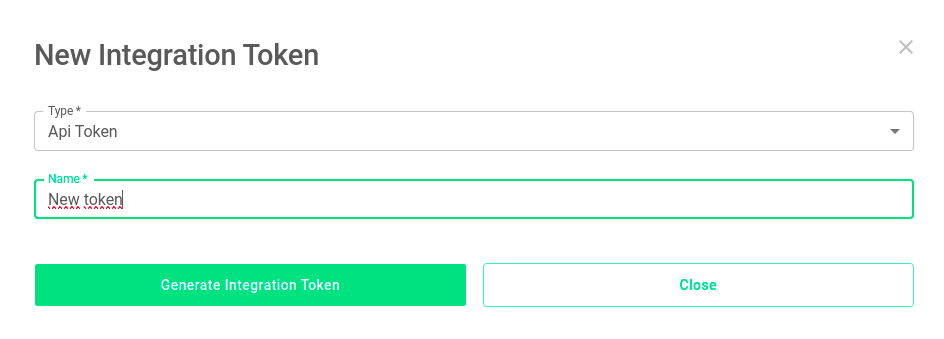
3 – Select the type API Token and fill in the Name field. Then, click on Generate Integration Token.
Creating an External Service Zabbix
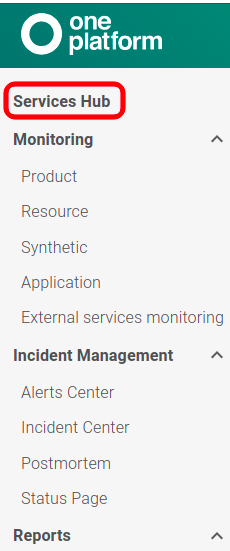
1 – Go to the Service Hub, located in the left sidebar menu.
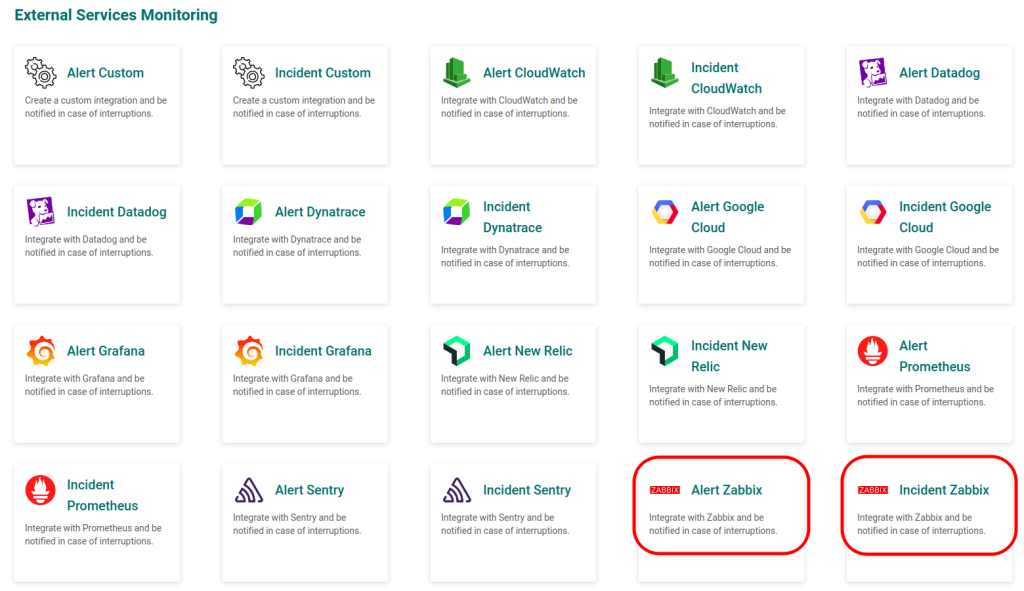
2 – Select from the options: if you want to open an alert, choose Alert Zabbix; if you want to open an incident, choose Incident Zabbix.
3 – In the form, fill in the External service name and the Responders who will receive notifications from this service. Then, click CREATE.
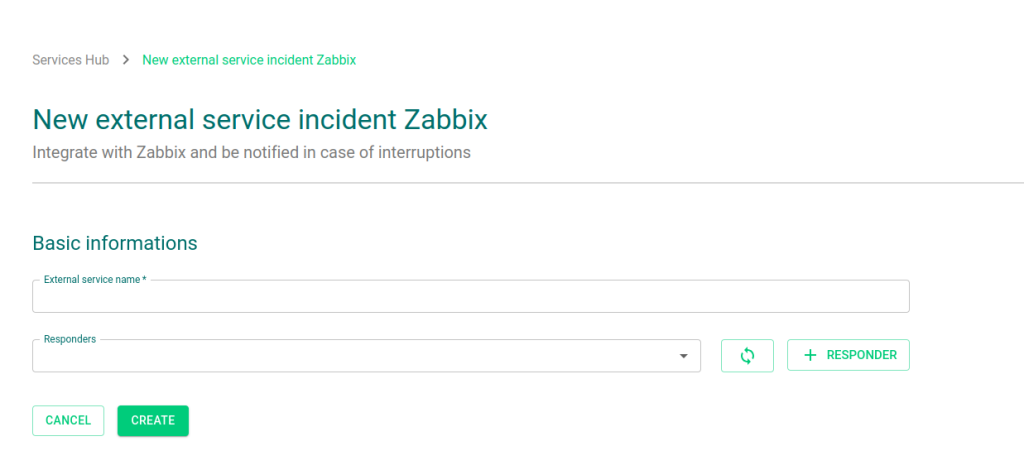
4 – Further down, the information for your External Service will appear, requesting you to select an API token. Choose the one created earlier.
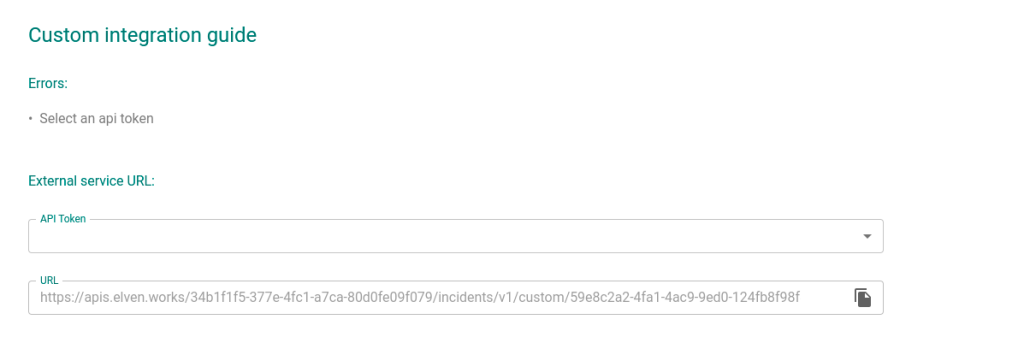
5 – After selecting the API token, the necessary information to configure the External Service Zabbix is complete.

6 – After being created, your External Services will appear in the External Services Monitoring Center

Configuring in Zabbix
- Supported Zabbix versions: 5.0.1 – 6.0.1 – 6.0.19 – 6.0.21
1 – In Zabbix, in the menu on the left, go to Administration and click on Media types:
2 – Click Import in the top right corner of the screen and select the Zabbix version configuration file:
3 – After selecting the file, select the Create new option and click Import:
4 – Then go back to Media types and select One Platform that was created:
5 – Configure the fields with the data that was passed through External Integration:
Where is <PLACE YOUR ONE PLATFORM>, change to data:
one_platform_organization: Organization uID
one_platform_url: API URL
After configuring, click Update.
6 – In the left menu, go to Administration and click on Users:
7 – Select the Admin user and go to Media:
8 – Click on Add and configure the Media:
Type: One Platform
Send to: One Platform
8.1 – Click on Add and then click on Update:
Steps 8 and 8.1 must be done for all configured users for whom you want to release the Media type.
9 – In the left menu, go to Configuration, click on Actions and Trigger Actions:
10 – On the Action tab, give the action a name and, in Conditions, click Add:
10.1 – Select the type according to your settings: (ex: Host/Host Group)
10.2 – Click Add.
11 – In the Operations tab, click Add:
11.1 – Configure the desired operation for your Action trigger:
12 – The same procedure must be done in the Recovery Operations field:
12.1 – Click on Add in the Operation details window and then on Add again to add the Trigger action.
13 – Done! Your Zabbix is already integrated with our 1P platform. Whenever there is a problem, it will be alerted on the platform in the Incidents tab and, when resolved, the Incident will be considered Resolved.
Add severity to Zabbix integration
To configure the severity of the incident, go to the settings menu, under “hosts” and click on “triggers”
Go to the trigger you want to add the severity to or create a new one and choose one of the available options.
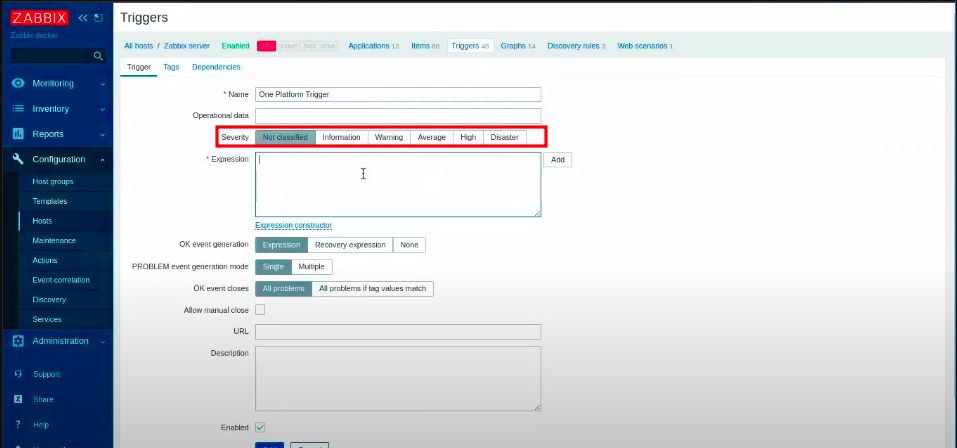
The severity will appear in the standard used by One Platform:
information = informational
warning = low
average = moderate
high = high
disaster = critical